


List of people under a department head by Justin using Power Automate
Here is how I solved the scenario List of people under a department head.
This automation runs every day at midnight and produced the file allemails.txt. Also shown below.

I used Microsoft Power Automate, because it is available for me free under the license that my company provides for me for Office 365.
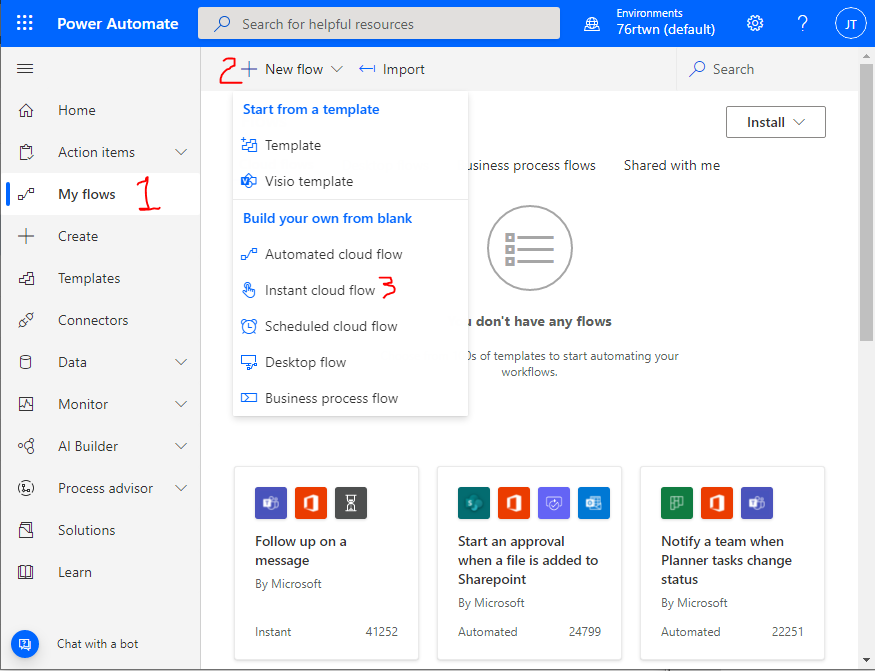
I went to https://flow.microsoft.com, signed in, and click on "My flows" > "+New flow" > "Schedule cloud flow".
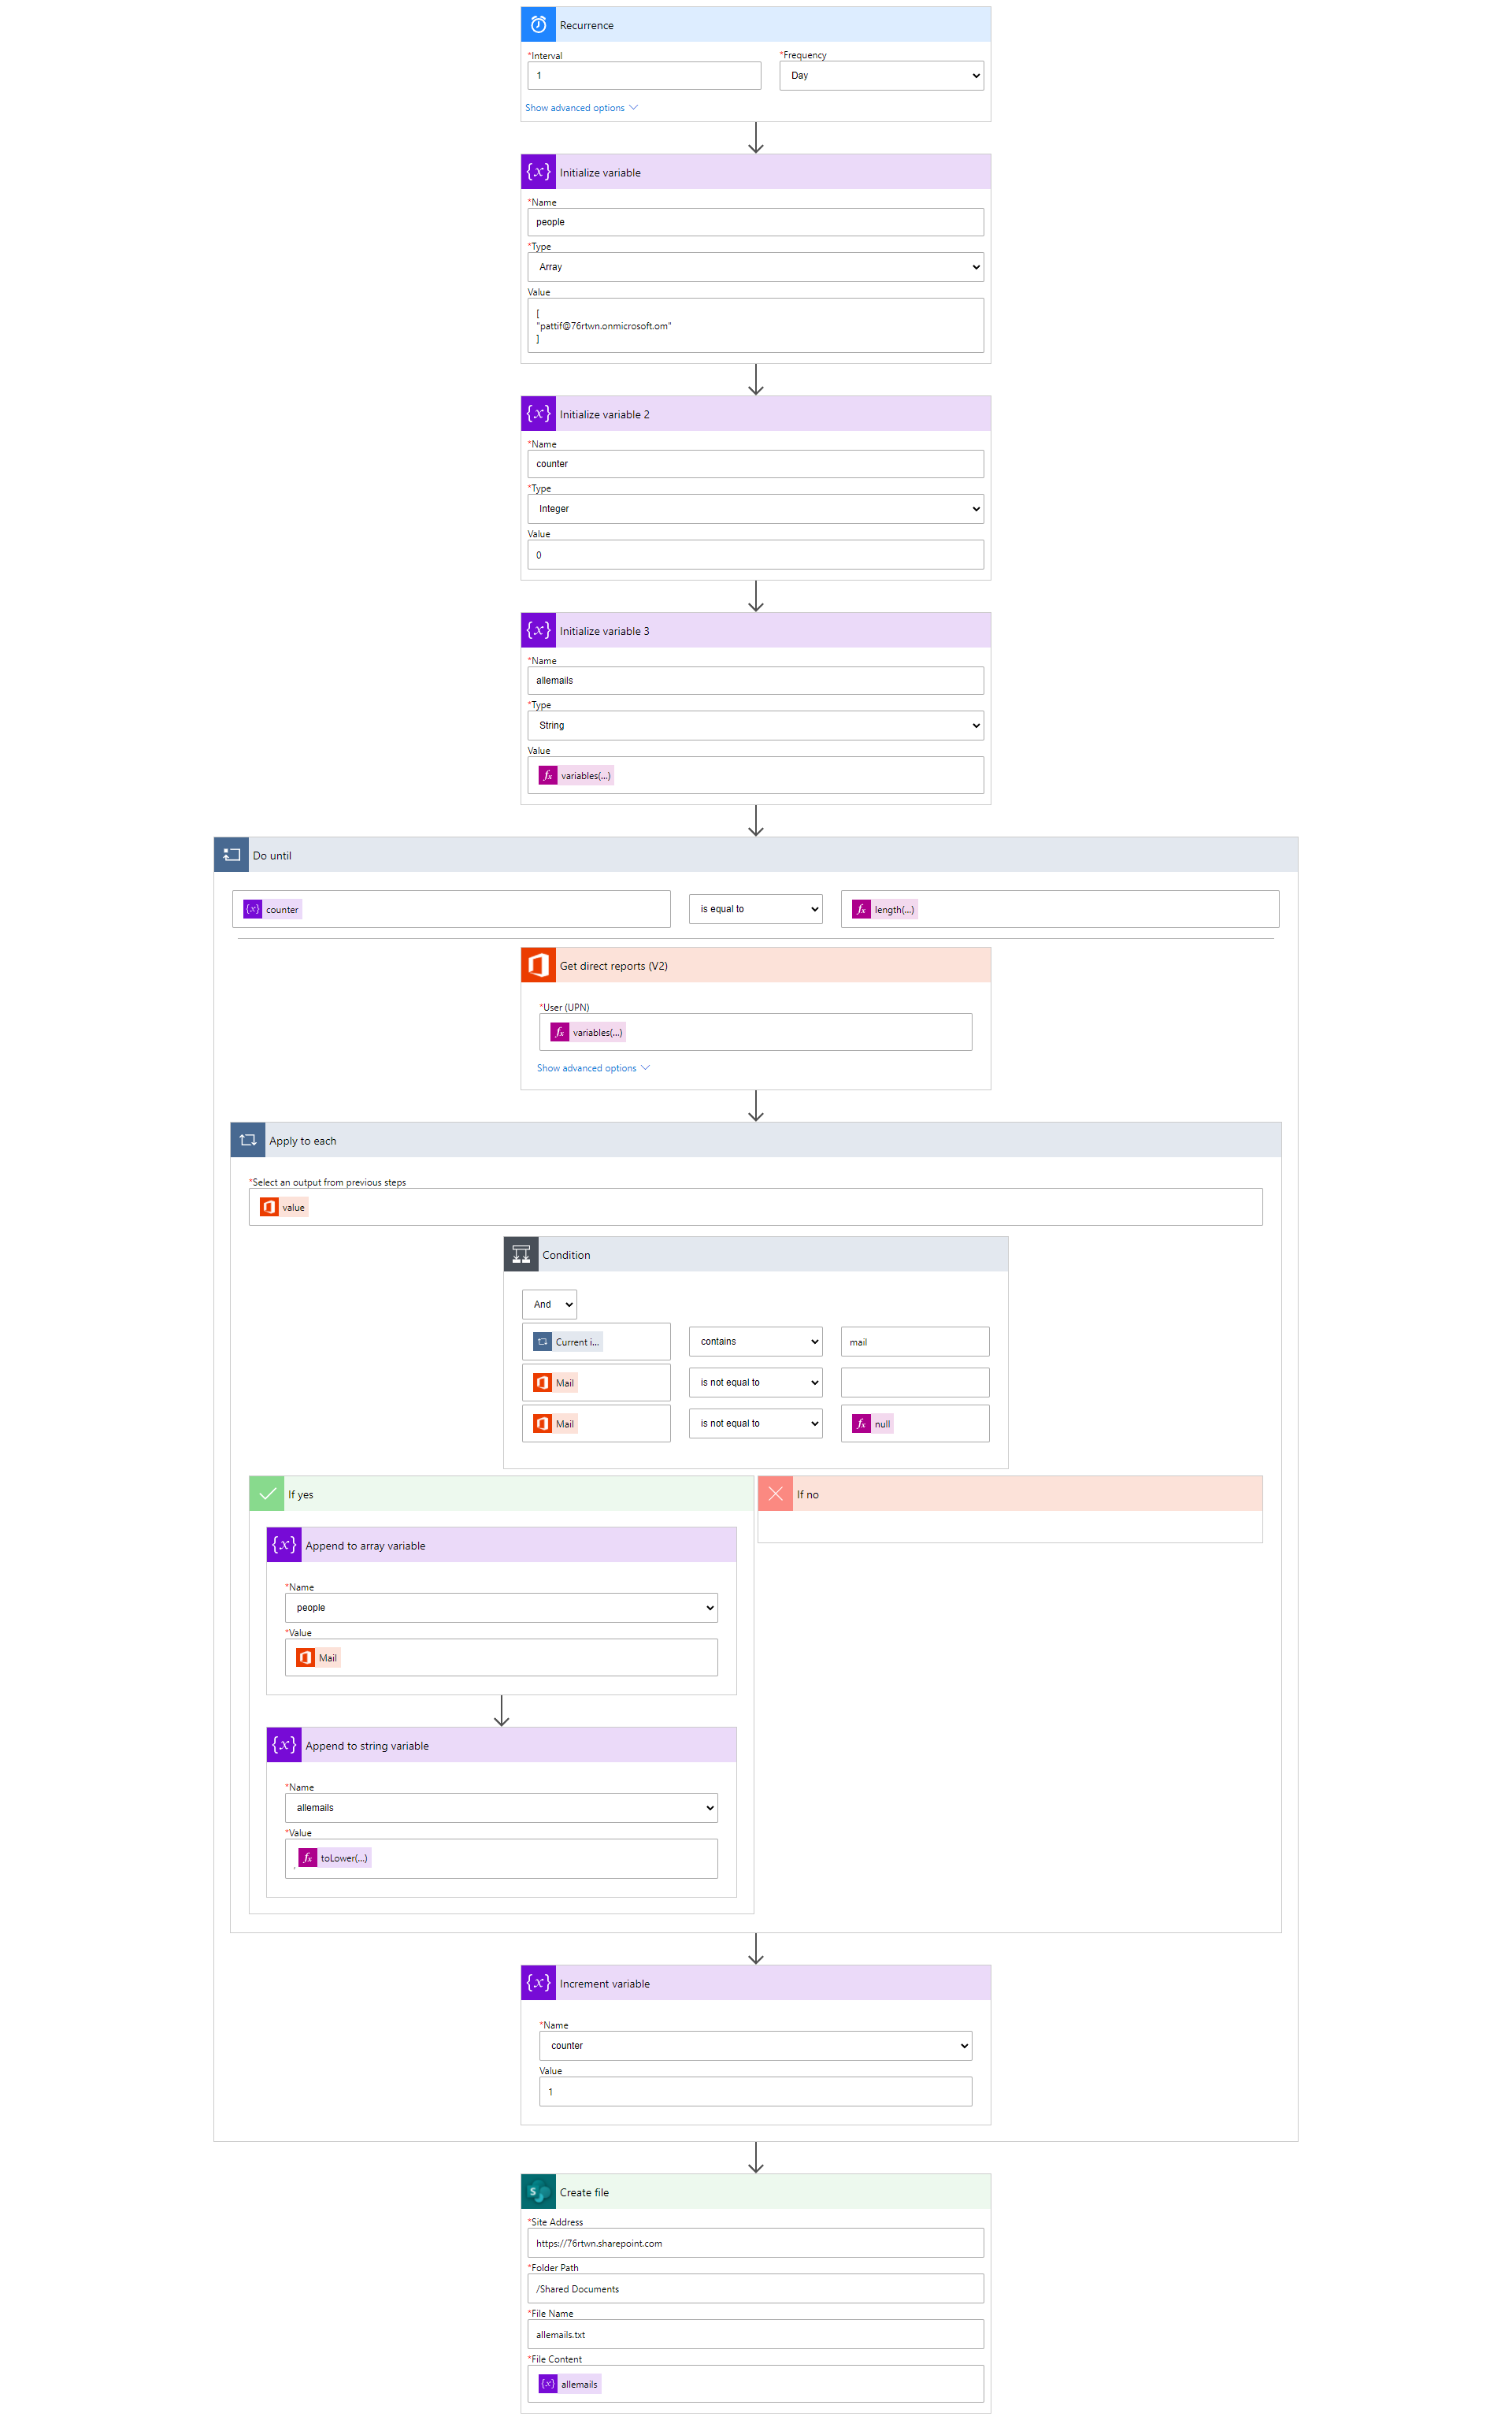
You can see the entire flow that I created in the screenshot below. Or click to see the screenshot live where you can click around to see how all the buttons and variables look inside of Power Automate. Or you can download the flow as a zipped file and import it into Power Automate.
NOTE: If you have never used Power Automate before I would definitely recommend that you try it out. It comes free with an E3 Microsoft Office 365 license. It is incredibly powerful. We will have some basic tutorials for Power Automate soon. Until then, see below for a taste of what it can do.
My trigger was the recurrence trigger, a certain time of day. I set the flow to run starting tomorrow at 12AM and to run every day. You could set the frequency to more or less depending on the needs and turnover in your department.

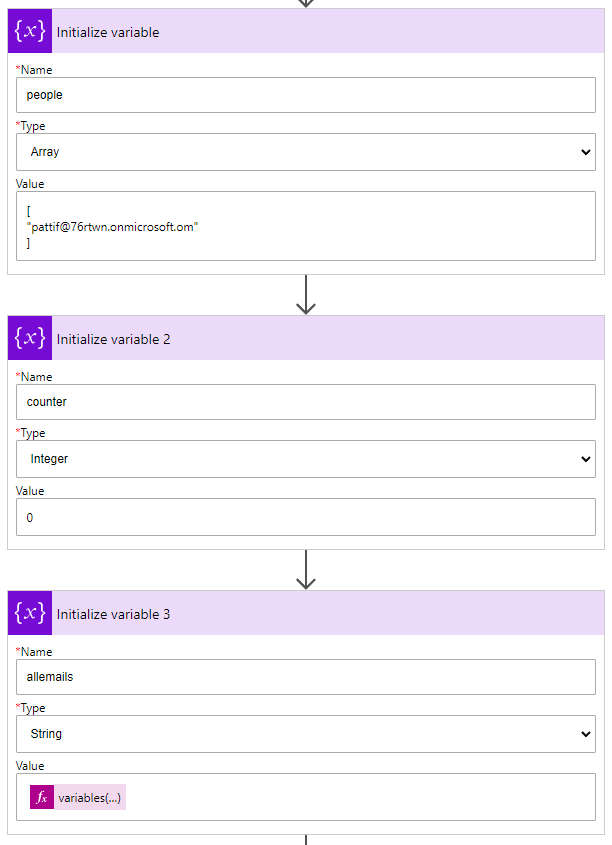
The next three actions initialize the variables we will be using later. Power Automate requires that all variables be initialized first. They must be initialized before any kind of looping or conditional checks. The "people" variable is an array containing the email address of the top person in our department. We will analyze the people under this person and add them to this array. The counter variable is an integer. We set it at zero to begin. It will increase with every direct report that we analyze. At the end of the automation, this "counter" variable will be equal to the number of people in our "people" variable. When this variable equals the number of people in the "people" variable, we will know that the automation has reviewed all people under the department head and can finish. "allemails" is a string variable which starts out with the address of the person in our "people" variable. As we find people under the department head, their email address will be added to the "allemails" variable, separated by a comma.
Next we do a "Do until" action. The action will run until the "counter" variable is equal to the number of people in the "people" array variable. Inside the "Do until" action we do a "Get direct reports (V2)" action. For this we input the email address of the employee whose direct reports we want to get. We get this email address from our "people" array variable. The number of the item from this list is determined by the value of the "counter" variable. The "counter" variable starts at 0 so we will get the first item in the "people" array. Arrays in Power Automate start with the 0th item.
Next we use the "Apply to each" action to go through each of the direct reports that were returned by the previous action. If the direct report has a property call "mail" and if the value of "mail" is not blank or null, then we will go to the next step.
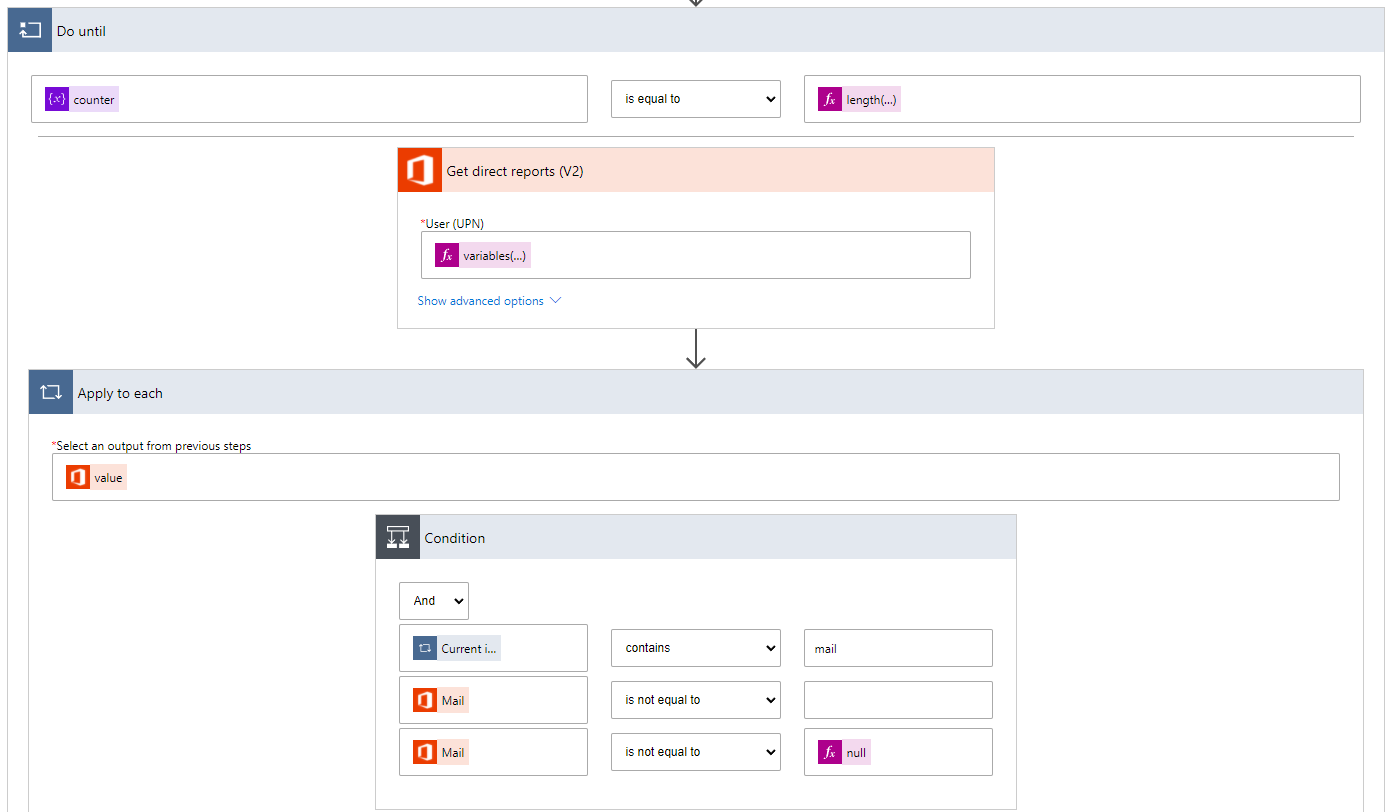
If the previous conditions are met, then we add the new email address to our "people" array variable and we add a comma and then the email address to our "allemails" string variable. Regardless of whether the conditions were met or not, we increase the counter variable by one. The "Do until" action is then repeated until the "counter" variable is equal to the number of people in the "people" array variable.

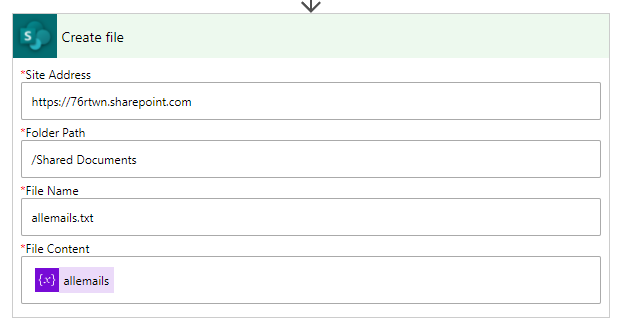
The final action is the "Create file" action. This creates a file on SharePoint. We indicate the Site Address of the SharePoint, the Folder Path, the File Name, and the File Content is the contents of our "allemails" string variable.
You now have two ways to get the automation to create the allemails.txt file. You can either wait until the next day at 12am or you can click on "Test" in the top-right corner of Power Automate. Select the "Manually" radio button and then click the "Test" button in the bottom-right corner. If this is your first time using an automation to do something on SharePoint (create a file here) you may be prompted to give Power Automate permission to access SharePoint on your behalf. Then click the "Run test" button. The automation takes about one second per person to run. So if you have 300 people in your department like me, it'll take about 5 minutes to run. Then go to your SharePoint's Shared Documents folder to see your new file. Another thing you could do is to use the "Send email" action at the end of your automation to send yourself an email notifying you when the automation is done running every day. You might feel like you're spamming yourself after receiving the same notification email every day. What I do is I compare this list to the previous week's list. If there are changes, then an email is sent to me letting me know who just joined the department and who left. If there are no changes, then I don't get an email. I'll show how to do this with a future scenario and solution.
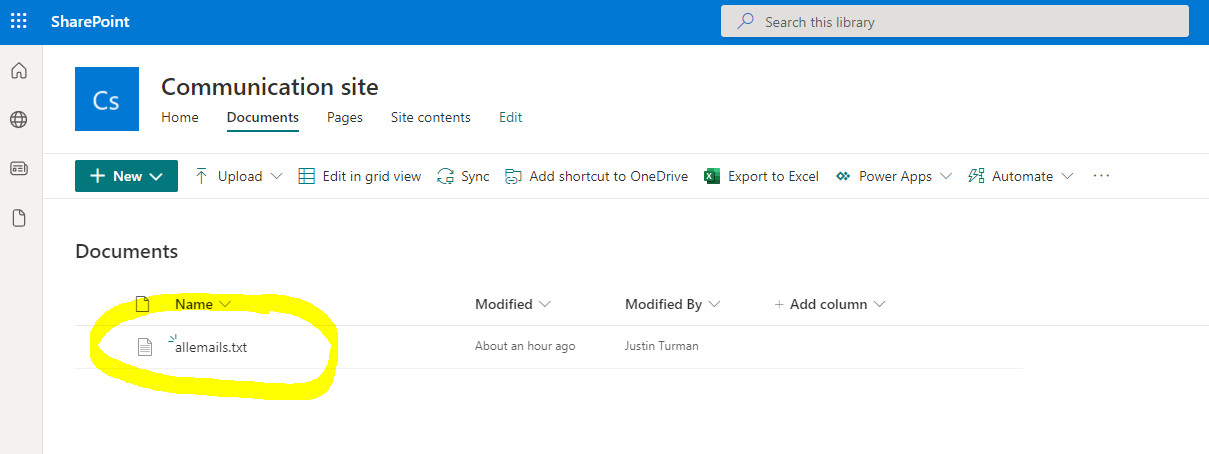
The file allemails.txt is created automatically on SharePoint
Given the single input of the email address of our department head, we have created an automation that runs every day and produces a text file with the email addresses of everyone under the department head. This list is very useful as we will explore in other more complex scenarios. But now we have a good foundation to go deeper.


